


CONDITION: Open Box
Item is in open or damaged packaging and has not been tested. Item may show signs of handling and may be missing parts or accessories.
Returns Accepted
We accept returns under specific cicumstances.
See return policy for details
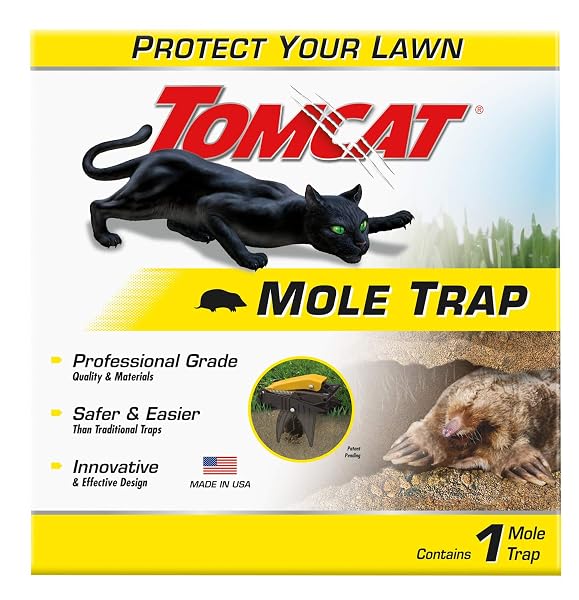
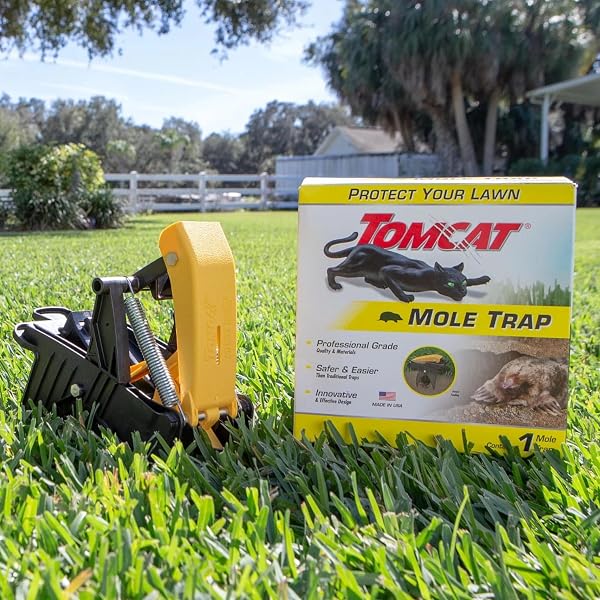
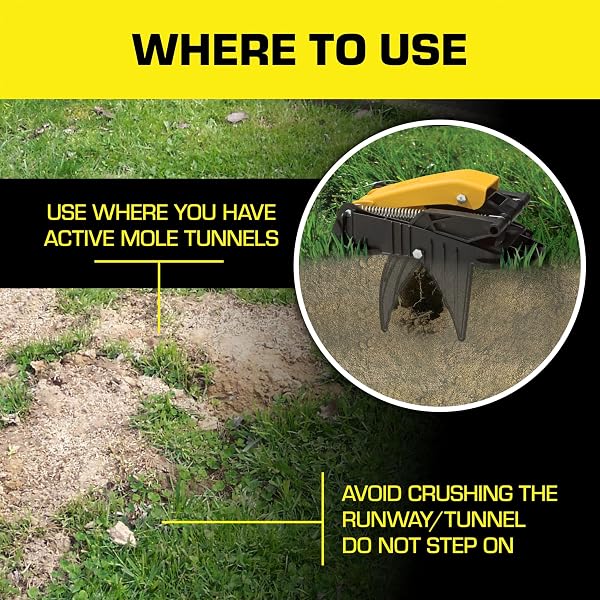
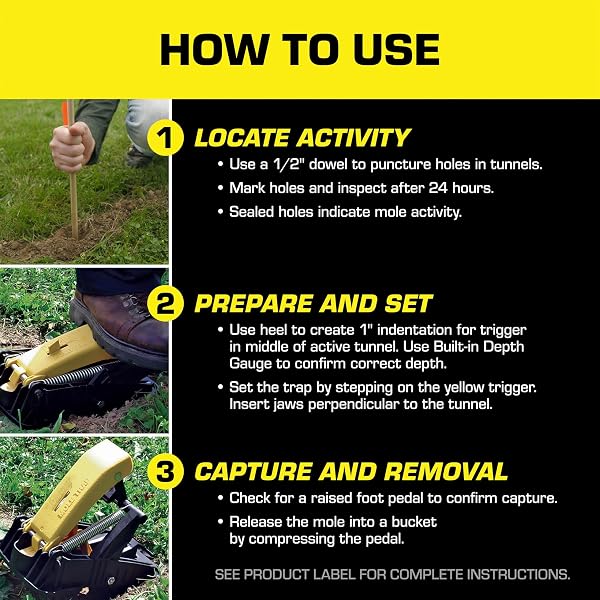
TOMCAT MOLE TRAP, INNOVATIVE AND EFFECTIVE MOLE REMOVER TRAP KILLS WITHOUT DRAWING BLOOD, REUSABLE AND HANDS-FREE, 1 TRAP
TOMCAT MOLE TRAP, IN... see more >
Bidding Starts At
$3.99
Create an account to place a pre-bid
Already have an account? Log in here
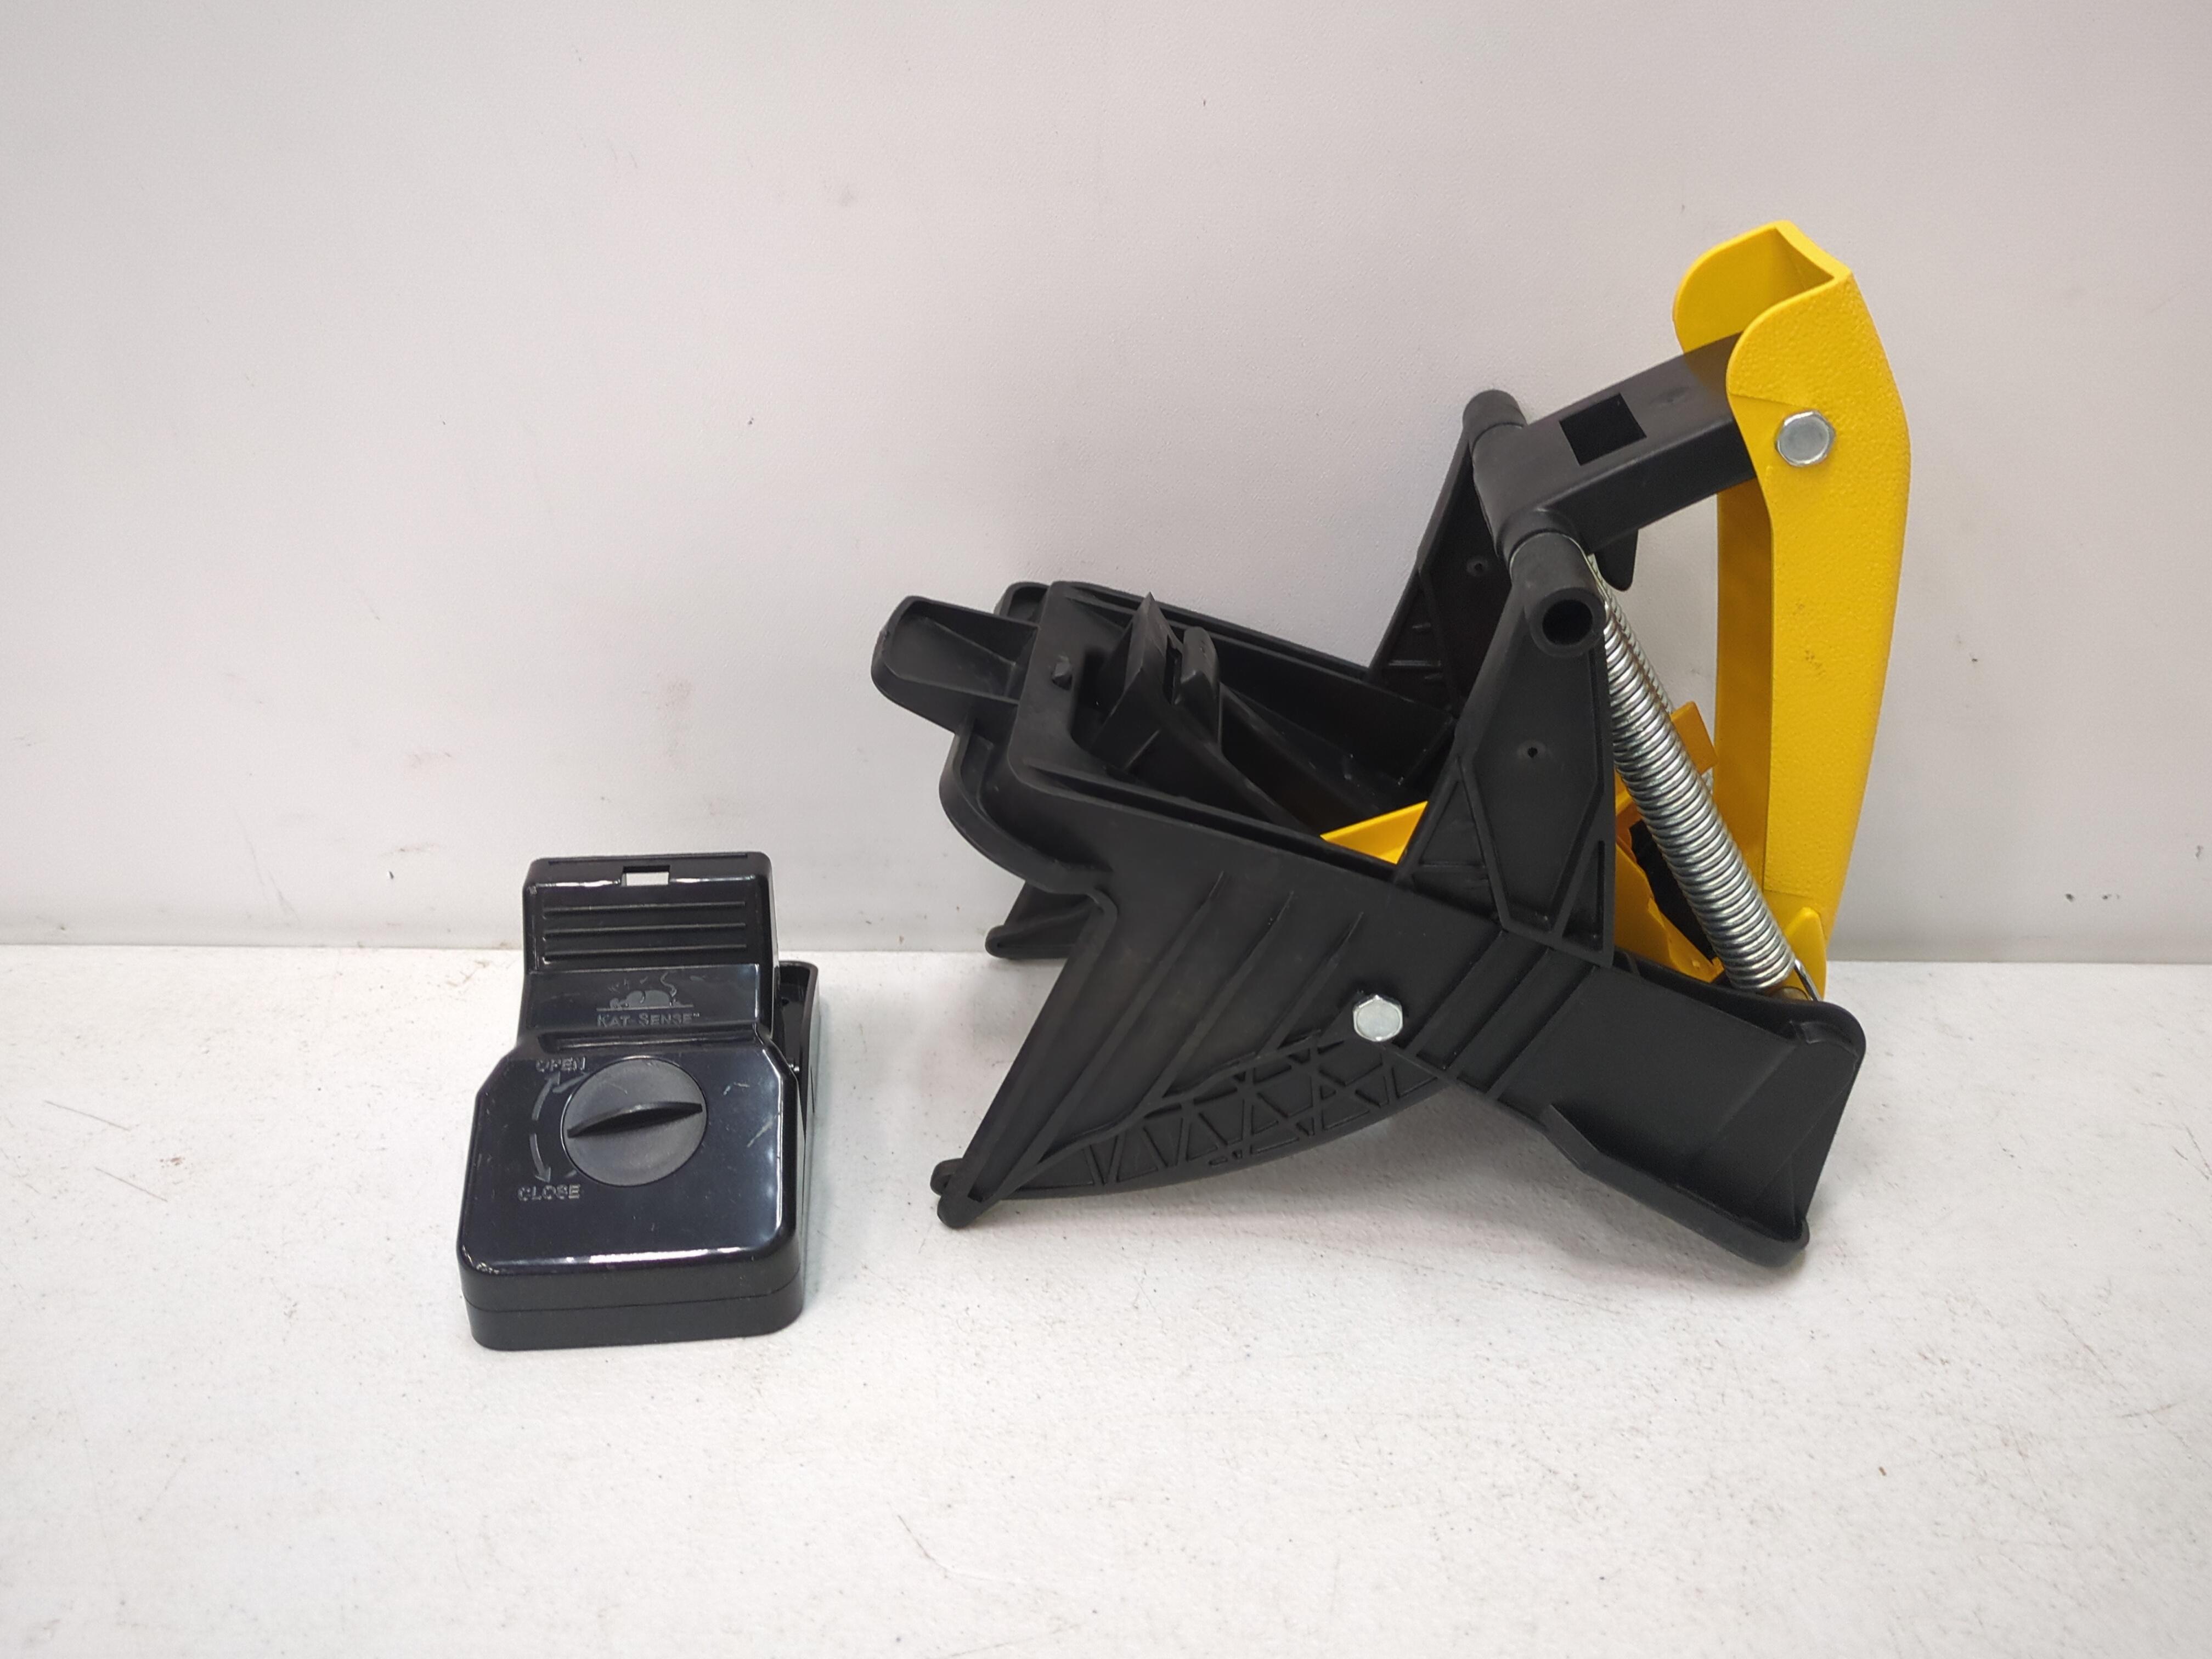
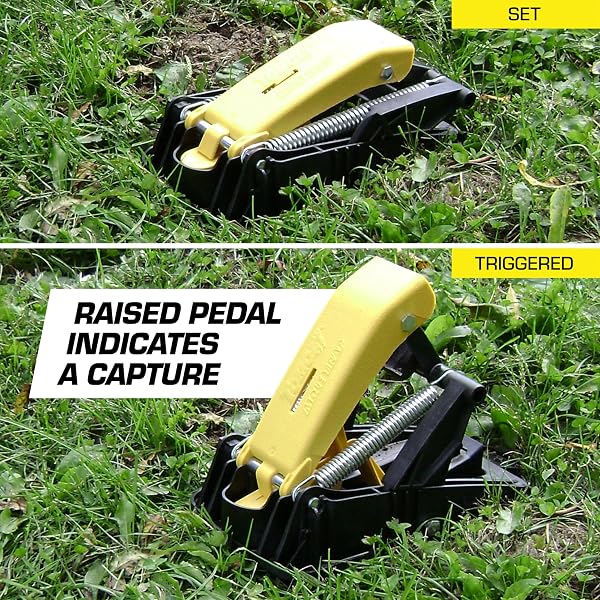
Moles have finally met their match. The Tomcat® Mole Trap is a heavy-duty, dual-spring trap that is safer and easier to use as well as more effective and durable than traditional traps. The unique, curved jaw design of our mole remover trap effectively captures and quickly kills moles without the need to draw blood. That's right, our BioSafe Design avoids spears so you can avoid a messy, unpleasant disposal process. The reusable Tomcat® Mole Trap is specially designed as hands-free and fast and easy to place and set. Simply identify active mole tunnels in your lawn, place the trap jaws in the tunnel, then step on the trap's yellow foot pedal to set the trigger below the surface. You will know a mole has been caught when the yellow foot pedal is raised. To dispose, compress the pedal against a garbage can and the mole will be released. This package of Tomcat® Mole Trap contains 1 mole trap.
View more auctions
OOAK ELECTRIC TOOTHBRUSH WITH 5 BRUSHING MODES, 2...
OOAK ELECTRIC TOOTHBRUSH WITH...

PARIIAOTIN PREMIUM LEATHER CAR SEAT COVERS FULL SEATS,...
PARIIAOTIN PREMIUM LEATHER CAR...
RUSTINS REDOW1000 QUICK DRY RED OXIDE 1L
RUSTINS REDOW1000 QUICK DRY...
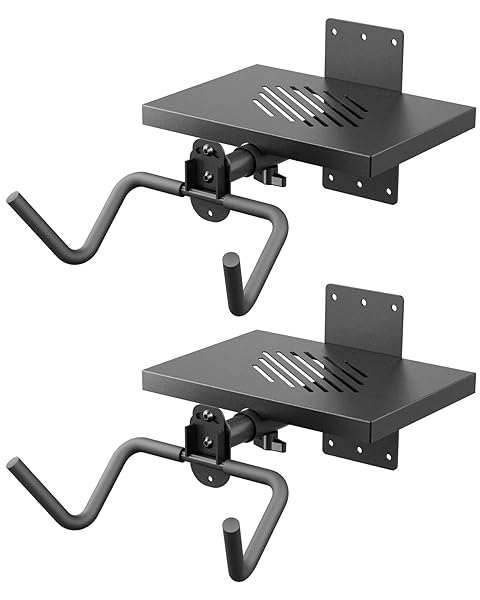
JIVAJOT BIKE WALL MOUNT, BIKE RACK GARAGE HANGER,...
JIVAJOT BIKE WALL MOUNT,...

JOYROOM WIRELESS CAR CHARGER MOUNT【DUAL COIL】 CAR PHONE...
JOYROOM WIRELESS CAR CHARGER...

CLEARSTEM HYDRABERRY HYDRATING FACE MASK FOR WOMEN –...
CLEARSTEM HYDRABERRY HYDRATING FACE...
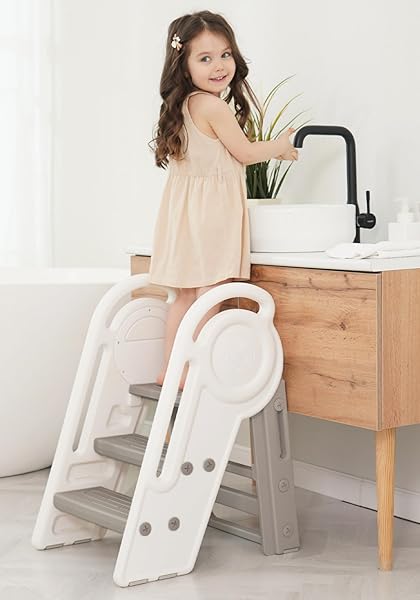
HARWAYA FOLDABLE TODDLER STEP STOOL FOR BATHROOM SINK,...
HARWAYA FOLDABLE TODDLER STEP...

YALE | LIFTMASTER SMART LOCK WITH TOUCHSCREEN DEADBOLT...
YALE | LIFTMASTER SMART...
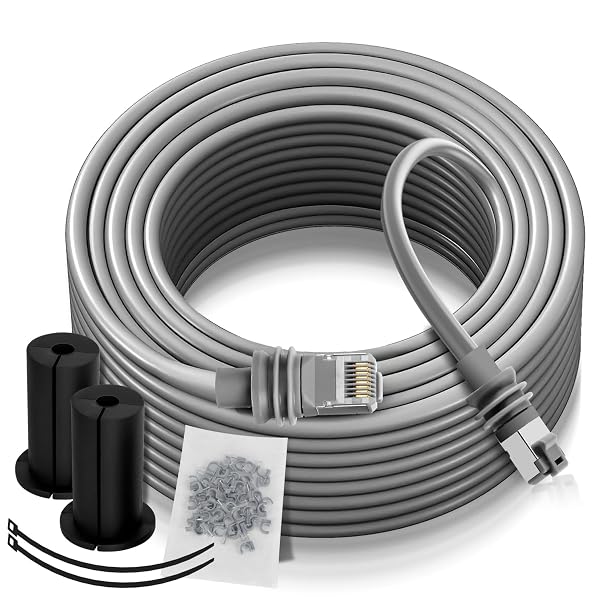
LUFECHO CABLE DESIGNED FOR STARLINK SATELLITE (100-2)
LUFECHO CABLE DESIGNED FOR...

POLY VOYAGER FREE 60+, RETAIL, USB-A, USB A/C...
POLY VOYAGER FREE 60+,...
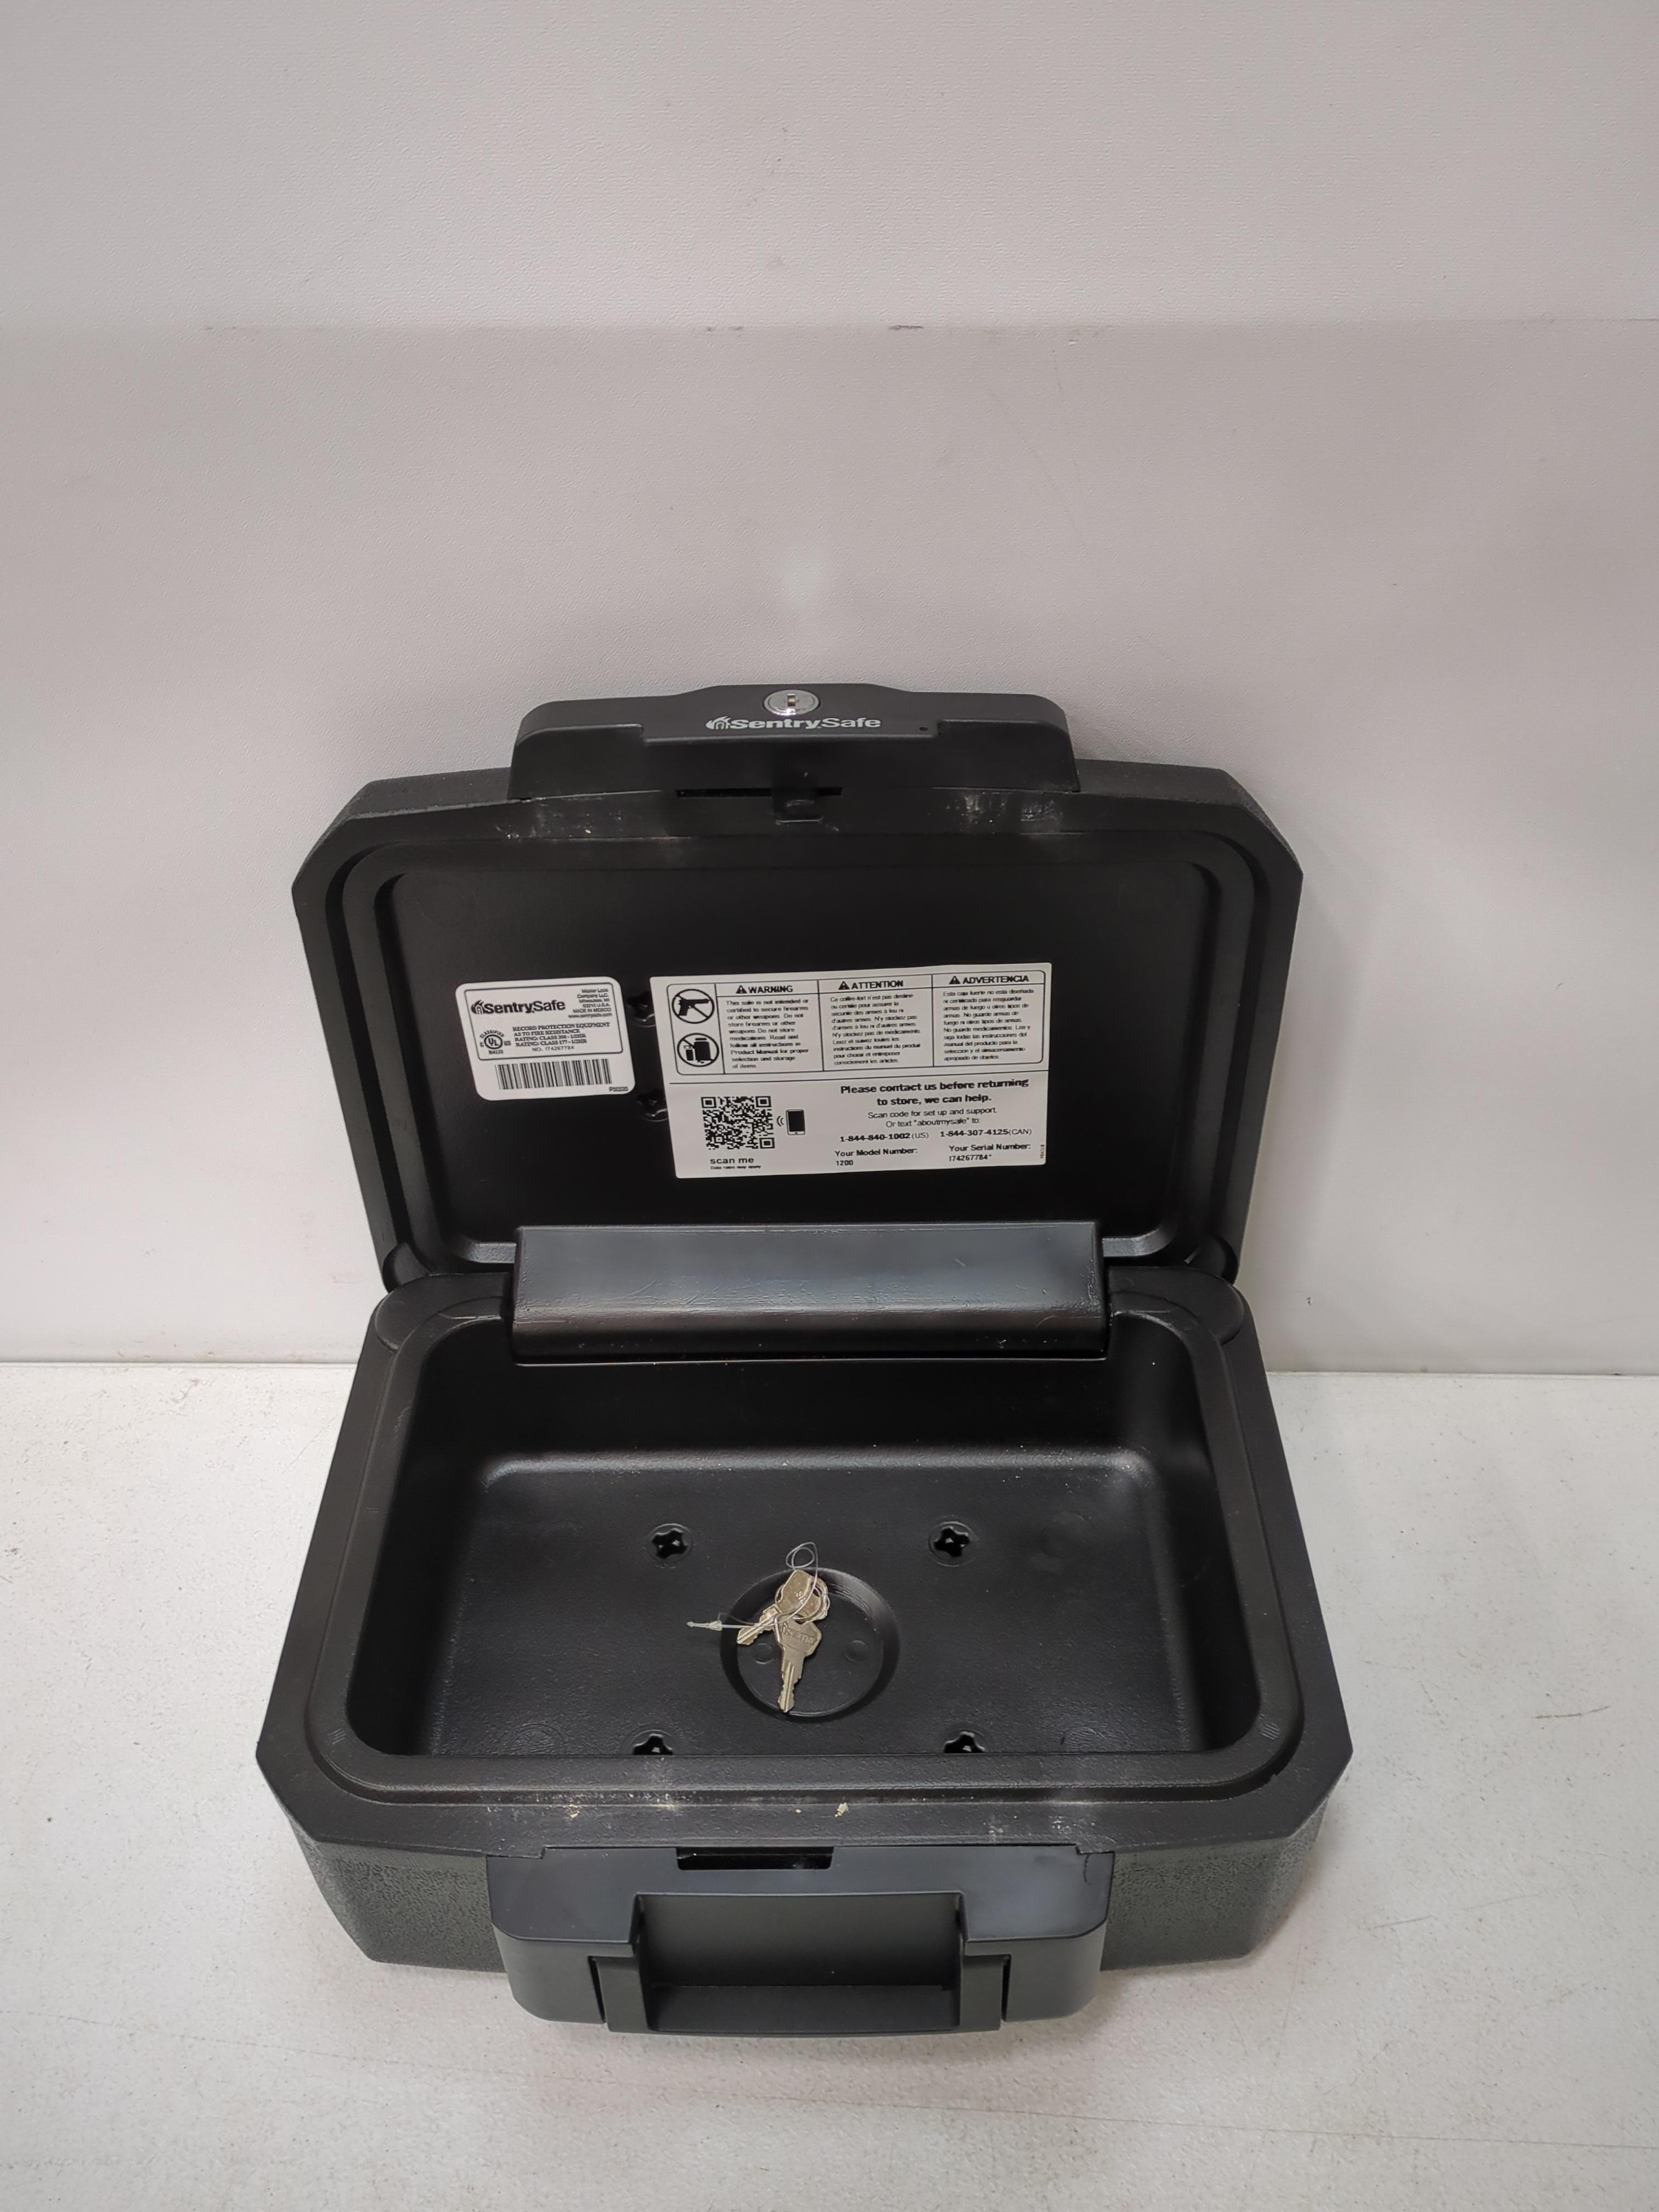
SENTRY 1200 HOUSEHOLD SAFE UL LISTED 30 MINUTE...
SENTRY 1200 HOUSEHOLD SAFE...

TECXLERON DASH CAM, 4K FULL HD DASH CAMERA...
TECXLERON DASH CAM, 4K...
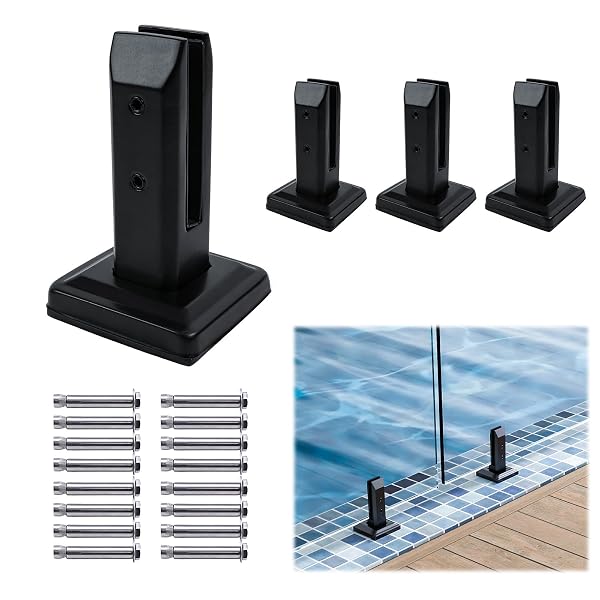
MUZATA 4PACK BLACK GLASS RAILING SPIGOT CLAMP RECTANGLE...
MUZATA 4PACK BLACK GLASS...
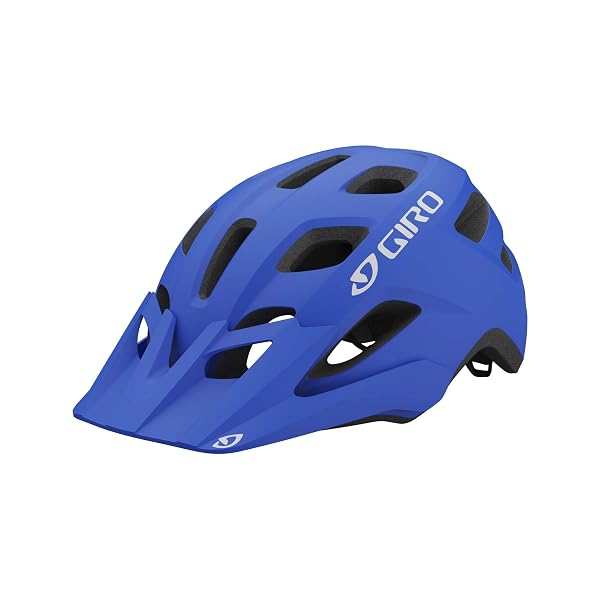
GIRO FIXTURE MIPS MATTE TRIM BLUE UNIVERSAL ADULT...
GIRO FIXTURE MIPS MATTE...
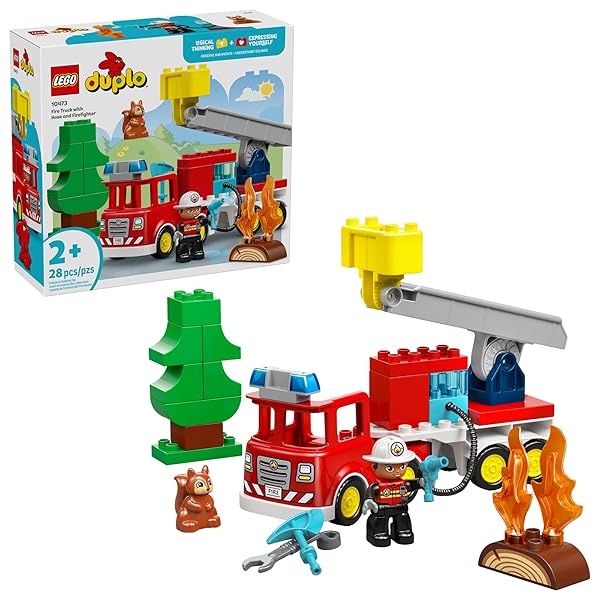
LEGO DUPLO TOWN FIRE TRUCK WITH HOSE AND...
LEGO DUPLO TOWN FIRE...

NEWBELLA HOBO PURSE, PU LEATHER SHOULDER BAG, TOTE...
NEWBELLA HOBO PURSE, PU...
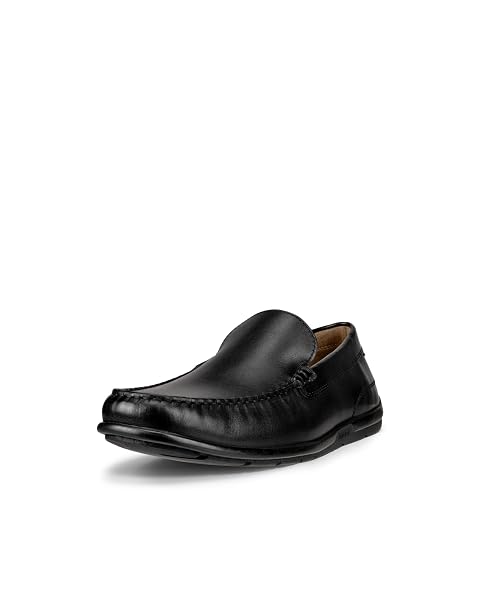
ECCO MEN’S CLASSIC MOC 2.0 DRIVING STYLE LOAFER,...
ECCO MEN’S CLASSIC MOC...
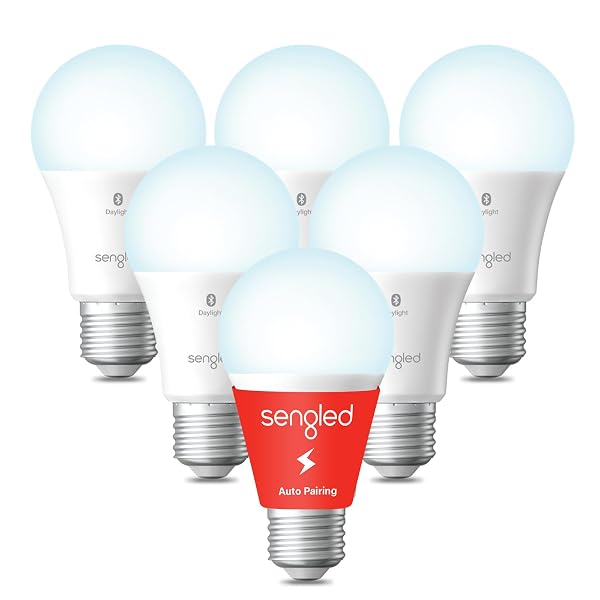
SENGLED ALEXA LIGHT BULB, SMART LIGHT BULBS THAT...
SENGLED ALEXA LIGHT BULB,...

REALTREE ADULT MULTIPURPOSE HEATED GLOVES
REALTREE ADULT MULTIPURPOSE HEATED...
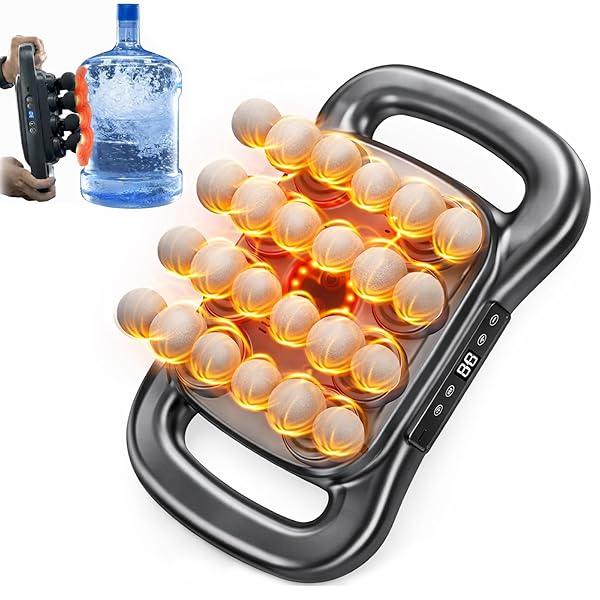
OTPUSKAY 24-HEAD DEEP TISSUE MASSAGE GUN SET –...
OTPUSKAY 24-HEAD DEEP TISSUE...
We have a few acres and fertile soil, perfect habitat for moles. They'd completely destroyed several areas of my lawn before I finally started taking action.I started many do.. actively watching for digging, armed with a pitchfork, shovel, or even a rifle. While I was successful one out of four times (pitchfork), it became abundantly clear that the time spent and success rate was just not feasible to sustain.After reading around, I started with the poison worms. We had limited success, some moles took the bait, others passed. The only way of knowing, or assuming, they worked is seeing tunnels stop. I'm one that likes seeing indisputable proof of success, which the worms don't provide.Enter this trap.I purchased four of them and, while I initially thought I went a bit overkill, I'm ultimately glad I did as I've had all four set at once a couple different times now.I've owned for two months and have dispatched six moles, which is every mole I've seen tunneling so far.I've waged war on these little pests, and I finally feel like I'm beginning to win.. lolFor those of you 'new warriors' out there, I'd like to provide some tips that I've picked up on over these last couple months, as I would've liked to know them myself early off.1. As others have said, do not set traps on mounds. These are feeding areas and the moles dig upwards, which will trigger the trap but will not catch the mole.Set Traps on Tunnels, perpendicular to the tunnel, as prescribed in the instructions.2. You want the claws of the trap centered vertically around the actual tunnel, which means for deeper tunnels you'll need to dig a recess into the ground, around the tunnel, for the trap to rest. To test actual tunnel depth, just poke a stick straight down on the center of the tunnel and feel for when the stick breaks through the dirt ceiling.If the tunnel is 4 or more inches deep, I suggest trying to find a more shallow part of the tunnel to set the trap, as it's easier to set and (at least for me) has a higher success rate of capturing the mole.3. The instructions say to stomp an indent on the center of the tunnel where you set the trap. This is to allow the trigger mechanism, a yellow plunger that engages downward, space to engage. This can be a pain, especially on deeper tunnels. I've found that using a spade to dig out the center of the tunnel between the claws makes it much easier to engage the trigger without it bottoming out, preventing engagement.4. The trap can be difficult to plunge into hard earth. The plastic claws, while quality molded, have round tips and the trap itself doesn't have any great leverage points to fully use your body weight to press down. You will want to use a bit of water to soften the ground, not the tunnel, where you're jamming the claws down into the ground when the dirt is hard.5. Adversely, if after setting the trap you get a heavy rain, you should reset the trap after the soil dries up a bit. What I've found is that setting the trap digs a track for the claws to pinch when it's triggered. After heavy rain, that track gets filled with mud which prevents the claws from pinching, effectively neutralizing the trap.Overall, this is a very effective trap once you get the nuances figured out. My success rate after figuring out what I've explained above has been 100%.The only Con, as alluded to in tip 4, is in the process of plunging the claws into the ground. The claws have rounded tips. This makes them less likely to bend or break during setting while also making the trap engagement smoother, but makes pressing into the ground more difficult. There are no great positions for hands or feet to get maximum leverage to press straight down for this task. I've had several sets where I put all my weight on my hands to get the trap down as far as possible, then got up and braced myself against a nearby tree to get my feet on the very edges of the trap to get it the rest of the way down, as there's no great way to balance on it.All in all, I finally feel like I've taken my yard back from these pesky little suckers and it's all thanks to this trap. I hope this helps you all do the same. Good luck!
I really don’t like this strap it doesn’t work, after being set up for the third time it did break so it’s not durable at all and it’s extremely hard to set up. It just doesn’t like to lock, to be activated, in place so to me it’s a useless product.
I tried a few other brands and tricks. Nothing worked. I had a few moles in my backyard that wreaked havoc on my lawn but what worried me most was that a few went into my little raised garden and started messing with my tomatoes. No one messes with my tomatoes!Went to a local garden store here and found two TomCat traps sitting lonely up on a shelf, in a corner. I was a little skeptical but bought them both because I was desperate at that point. Went home, got them out of the box, read the instructions quickly and went for the freshest feeding tunnel I could find. I had done some research online (YouTube) on mole behavior, etc. I had a male mole that was creating the most damage in one area (judging by the gigantic mating hole/mound with a nice fresh main feeding tunnel running away from it). This guy was hungry and every time I'd collapse his feeling tunnel, he's come right out of his hole and pissed off, he'd tunnel up right through, making that tunnel whole again. That is what you need to look for and set your trap (any trap) into -- fresh and active tunnels with emphasis on "ACTIVE". I followed the instructions, made a small indentation using the heel of my sneaker into the middle of that active feeding tunnel, and using the depth gauge which is part of the trap, made sure it was at the right depth, then set the trap and walked away. I attempted to do the same with the second trap, using a different area, another tunnel some 20 feet away. I don't think I took ten steps when the trap I had just setup, sprang up. I thought it was a mistake, that somehow it snapped and disengaged. Walked over and pulled it out and to my astonishment, a very fat, well fed male mole was hanging dead, out of one of the claws. Its death was swift and humane (for those mole lovers out there). It did not suffer.I was sold right there. This thing is built to last (not sure why other users had trouble with these things). The plastic material is well molded, strong and well built. It all looks beefy and well put together. Springs are strong and so are the bolts. I didn't see any weak points in terms of built and strength. The top part is bright yellow which is really a nicely thought out feature ( you can see it from afar if trap is still set or if trapping had occurred) I left the traps out in the rain for days and not a single spec of rust on anything metal, has ever been noticed. I hose them down to remove debris and it all comes off within seconds.IMPORTANT -- setting the trap (getting the latching mechanism to engage) can sometime be tricky. At first, I thought there was something wrong with the product. You'll notice that sometime the trap sets right-way and sometimes it doesn't latch easily. The problem lies with the initial indentation made in the active tunnel before setting the trap and the amount of grass or debris underneath the trap, when you set it. It works best on a short mowed grass. Make sure you trigger (what's hanging over the little indentation made with your heel, in the middle of the tunnel) hangs right over it and nothing pushes up against it. The trap has depth gauge which you can use to make sure that the indentation made is at a proper depth. These things can make setting this trap a bit tricky (at times). Don't give up, play with it (keeping your fingers/limbs away from its claws) and learn how to set it properly. The more you use them, the easier it all gets and it's all worth it.Very happy with this trap. Caught a few extra moles since the first catch. It works really well. Take the time to set them properly and you will not have mole issues again (and if you do, these things are real killers).
The mechanism on this trap is somewhat hard to set properly. It is light and has directions on box and instructions inside. After a few misses, I was able to trap a mole. The mole was still moving so after freeing him, I had to use a shovel to finish the job. Since then the trap doesn't seem to work anymore as I had a mole tunnel right through it. No luck at all since then. I am not sure what has happened but it appears the mechanism is no longer functioning.Update: I updated the rating. I have toyed with the trap a bit. I now dig a furrow on either side of the mole hole to set the trap in somewhat like an | | shape. The sides are dug then with gloves gently add some dirt to the center. Rock the trap back and forth a bit with foot to settle it in. DO NOT force the trap if it doesn't want to close and set. If the trap is having trouble closing then check for the dirt furrow to be sure it is relatively clear of obstructions and remove a bit of dirt from the mound in the center. Also check for tough or thick grass which is keeping the jaws from opening. Pay close attention to the little lever and test it (use a stick on the little yellow switch on top) to make sure the trap will spring. Then reset the trap. I just eliminated a second mole and so far this trap has been the best of the three types I bought which included a Yard Dog trap and a Victor mole trap.3rd update June 23: What looks like a cheap plastic trap has been my best mole catcher. I just caught the fourth mole with this trap.
I found this trap difficult to set compared to the more traditional spike traps (like Sweeney's).However, it did catch a mole that was wreaking havoc in my garden. The soil there is pretty loose so it was easier to set the trap.If you have hard, dry, or clay soil, it is almost impossible to use this trap. It suggests using a spade to cut a place for the trap jaws, but in heavy dirt by the time you tear up the ground to do this, not even the most dim-witted mole will come near it.I do like the fast kill, bloodless jaws. I think this is much more humane than other traps.
I was skeptical but it works great. I already have 3 less moles destroying my yard. We have a lot and slowly making progress with just one trap. Our pest control people gave us a quote of $500 plus ongoing treatment. So glad I went with Tomcat.
I've tried for the last several days to set and use this trap. The directions are on the box, but there is also a troubleshooting guide that you will also need to understand.The issues are:- When you make the 'heel indentation', you have to be very careful to not overdo it and collapse or severely damage the tunnel. This trap depends on an indirect triggering mechanism that sits in this heel indentation but does not actually get touched by the mole. You have to be extremely accurate to get the indentation deep enough that it somewhat reduces that roof of the tunnel, but doesn't actually collapse it. The guide says that the depth should be 1 inch...don't bother with your heel, indent it carefully with your fingers.- the side legs/jaws need to have clean slots and paths to travel. Unless your lawn is just right with moisture, thatching, etc., you won't be able to insert the legs without collapsing the tunnel. The suggestion is to use a spade to pre-cut the slots for the jaws; this is only useful if you can guarantee to not collapse or clog the tunnel.- the setting mechanism requires you to step on the foot pedal/lever. For this to work, the entire base of the unit needs to be sitting on relatively firm ground. However, given that you have moles, your ground even around the tunnels is probably loose. Because of the amount of force needed, you'll probably end up smashing the unit down and collapsing the tunnel.- the latching mechanism to set the trigger depends on you pushing down on a small metal piece in the middle of the pedal. Unless you got that indentation exactly right, you'll find that you can't set the trap and you'll have to start all over. Or, if the indentation caved in and you have a hole there, you'll be able to set the trap but won't catch anything.A professional would probably be able to finesse all of these things, so the trap might work well for them. I'll give it 2 stars for that. However, for us amateurs, I suggest trying something else.
Got him 3 hours after I set the trap! I'm impressed. This works well and is pretty easy and safe. The only thing negative I can say is that if the ground isn't super soft, you'll have to dig out a small area so you can set the trap, the ground was average where I set it, not hard by any means, it was a bit difficult to push it into the ground and when I stepped on it to set it, I had both feet off the ground and didn't even budge it. I used my hand and dug up the area just a little, probably two handfuls and tried again, success! It set without a problem after that. If you have small kids, I would explain to them what it is and tell them not to touch it as it clamps down very strong and would probably break a hand. Of course you could probably just put a bucket over it or small fence around it, the mole wouldn't notice anything on the surface. Also, I like that I could see the yellow part sticking straight up from across my large yard indicating that I caught one. I was skeptical at first as I couldn't believe I got him, I just set the trap 3 hours ago!! But sure enough, I picked the trap up and there he was, dead, squished, no blood, I love it! Moles are solitary animals and there is usually just one, but I'll set it in a different tunnel across the yard just in case. Make sure you set it in a tunnel that is long and goes straight for at least 5 feet, those are the tunnels they use a lot, the curvy tunnels are just for looking for food and may only get used that one time.
Moles have been a constant presence in our front and back yards for years but it wasn't until a couple of years ago, when we relandscaped, that we made a concerted effort to rid our yards of these destructive creatures. It was heartbreaking to see huge mounds of dirt pop up in our newly planted lawns and garden beds. We tried smoke bombs and traps recommended by our local garden centre but failed to catch or eliminate a single mole. My husband even attended a workshop about mole behaviour and control put on by the trap manufacturer. The traps were a nuisance to set and involved digging out the freshest hole and placing a trap in each of the tunnels leading off from the hole, refilling the hole, then waiting (in vain) for the mole to trigger one of the traps. I found it difficult to set these traps myself so it was left up to my husband, when he had the time and/or the weather cooperated.With this fall came an increase in mole activity so we decided to try again, to no avail. Recently, we twice had a new mound pop up in the very holes in which the traps were located, without the mole setting off either trap. This was discouraging and frustrating, to say the least. The last straw occurred a couple of weeks ago when I was reseeding all of the mole holes that had popped up since summer (there were over twenty in the front yard plus loads more in the back). I smoothed out and seeded one of the most recent holes, then a short time later drove to the garden centre for more seed, only to return and find a new mound of dirt in its place. I sighed, flattened and reseeded it, went inside to have lunch, then came out later to find yet another fresh mound of dirt. I repeated the process, only to wake up the next morning to find the same spot disturbed for the third time. Now it was personal!Before calling in a pest service I decided to take a look online to see if I could find a less expensive alternative and came across the Tomcat website and this mole trap. I liked the idea that you didn't have to dig out the entire hole in order to set the trap and was impressed by many of the reviews here on Amazon. My husband and I felt like we had nothing to lose by giving it a try and placed the order.The Tomcat trap arrived last Thursday and we set it up that evening in the freshest hole in the back yard, after watching the instruction video on the the Tomcat website. I woke up the next morning and was excited to see that it had been triggered overnight. Unfortunately, we had mistakenly placed the trap parallel to the tunnel instead of across it so the trap was empty. Still, it gave me hope that this just might work! Over the next few days we set up the trap in several different holes in the front yard but even though new molehills formed nearby, the trap was not triggered. Monday morning I reset it in a spot that had been disturbed twice in the several preceding days and that afternoon, SUCCESS!! After disposing of the mole I immediately reset the trap in the freshest hole in the back yard but it has remained untriggered and there has been no sign of new mole activity in either the front or back yard since (almost 48 hours). While I am not naive enough to think that we will never have another mole invade our yard, I feel confident that this trap will nip any future mole activity in the bud before it can cause extensive damage.Like any new-to-me product, there was a bit of a learning curve but once I understood how it worked I found it a pretty straightforward process to set the trap. A number of people have mentioned that it is difficult to depress the trap mechanism but although it does take some effort, I was able to do so fairly easily as long as the trap jaws were free of mud and dirt (I sprayed them off between uses) and the insertion slits on either side of the hole were well defined so that the jaws could move freely. For reference, I am a woman in my mid-50's.It is amazing that a problem we struggled with for years was resolved in a matter of days, and may have been in less than 24 hours if we'd set the trap properly in the first place. I only wish I had discovered this product sooner and prevented the extensive damage moles have caused to our newly landscaped property.
In my opinion, this is more suitable for gophers than moles.
The trap worked as described. Once I found a usable tunnel to set the trap my unwanted guest was trapped within 12 hours. Unfortunately the mole was rather large and was not killed outright.This trap is recommended.
Totally worth the money. I have been battling the moles at my house with a different trap and never caught one. I purchased this on, it was so easy to Install and caught it IN ONE NIGHT!!!!!
I WAS READY TO GIVE UP ON THIS I TRIED EVERYTHING UNTIL A FRIEND TOLD TO GET A MOLE TRAP SO I ORDER ONE IT TOOK ME A WHILE TO GET THE CREATURE BUT ON NOV 6 IN THE AFTERNOON I NOTICED IT WAS TRIPPED AGAIN I THOUGHT OH GREAT ITS TRIPPED AGAIN BUT NO CREATURE BUT WHEN I PULLED IT OUT I HAD ONE BY THE TAIL STILL ALIVE IT WAS A STAR NOSE MOLE NEEDLESS TO SAY IT DIDN'T MAKE IT TO SUNRISE THE NEXT DAY THE WAY I GOT RID OF IT I THOUGHT TO MYSELF YOU PUT ME THROUGH A LOT YOUR GOING DOWN IN A SLOW BUT PAINFUL DEATH . DO I FEEL BAD NO I DON'T
-
Brand
Tomcat -
Color
Brown -
Style
Mole Trap -
Material
Plastic -
Product Dimensions
9"L x 6"W x 9.38"H -
Number of Pieces
1 -
Is Electric
No -
Target Species
Mole -
Unit Count
1.0 Count -
UPC
888603036325 -
Power Source
Manual -
Item Dimensions L x W x H
9"L x 6"W x 9.38"H -
Style Name
Mole Trap -
Material Type
Plastic -
Brand Name
Tomcat -
Manufacturer Warranty Description
Warranty -
Global Trade Identification Number
00888603036325 -
Model Number
0363210 -
Manufacturer Part Number
0363210 -
Manufacturer
The Scotts Company LLC -
Item Type Name
Innovative and Effective Design -
Included Components
Rodent Trap -
Best Sellers Rank
#24,210 in Patio, Lawn & Garden (See Top 100 in Patio, Lawn & Garden) #202 in Pest Control Baits & Lures -
ASIN
B012RDRGYU -
GTIN
888603036325 -
Recent Sales
300+ bought in past month
Buyer’s Premium
A 15% buyer’s premium will be added to the sale price of all purchases.
Store Auction Lots Condition
All items are uninspected and the condition is unknown unless otherwise explicitly stated. Items labeled as “Open Box” may have been previously opened, handled, returned, or repackaged. Packaging may be damaged, incomplete, or missing, and items may show signs of handling or cosmetic wear. Items are not tested unless specifically noted. Individual items are available for inspection at Korting Outlet located at 159 1st Court, Grand Rapids, Michigan 49534 during store hours.
The highest bids serve as legally binding contracts, and all sales are considered final. Items are sold on an “as is” basis, without any guarantees, warranties, or the possibility of refunds, whether written, expressed, or implied. The operational condition of an item may not be known or listed in the item description. While we may provide information on the condition of some items, including items marked as “New,” such information is not guaranteed.
All items are sold with all faults and without any warranty, whether expressed or implied, regarding merchantability or fitness for a particular purpose. The sale is conducted on an “as is, where is” basis with all faults. Buyers are strongly encouraged to physically inspect items before placing bids during the inspection period. Once submitted, bids cannot be withdrawn before, during, or after the auction for any reason.
The buyer acknowledges that these terms, along with other terms outlined below, can only be amended or revised in writing, signed by the auctioneer. Any representations made by Korting or its agents do not alter these “as is, where is with all faults” terms. Descriptions provided on products or through advertising, including condition labels such as “New,” are not guaranteed, and buyers rely solely on their own inspection. While information in sale advertising is believed to be accurate, Korting assumes no responsibility for errors or omissions.
Auction Closing Times
Posted closing times are in Eastern Time and may be extended through dynamic bidding. Dynamic bidding extends the auction close time until there are five minutes without bidding activity. Korting reserves the right to close early or extend auctions at its discretion.
Payment
Payments will be processed through Stripe.
Refund Policy
Due to the nature of liquidation merchandise, returns are accepted only under the following circumstances:
- Wrong item received
- Major undisclosed damage that significantly affects functionality or value
- Item arrives nonfunctional or dead on arrival (unless listed as untested, for parts, or salvage)
- Missing critical components necessary for basic operation that were not disclosed in the listing
- Counterfeit items or items materially different from the listing description
The following conditions are not eligible for return or refund:
- Buyer’s remorse or accidental purchases
- Minor cosmetic wear, scratches, dents, scuffs, or signs of prior handling
- Damaged, worn, or missing retail packaging
- Compatibility issues with buyer equipment, software, or intended use
- Missing non-essential accessories, manuals, inserts, cables, or packaging materials unless specifically stated in the listing
All return requests must be submitted within 72 hours of delivery and include clear photos and/or video documentation of the issue. We reserve the right to deny returns that do not meet the above criteria.
.
Sales Tax
All orders are subject to the 6% Michigan sales tax. Tax-exempt buyers must have a current tax-exempt certificate on file before sales tax can be removed from an invoice.
Failure to Pay or Remove Items
Korting reserves the right to charge a 15% non-refundable restocking fee for items not paid for and picked up within seven days of the auction closing. Such items will be considered abandoned and forfeited to Korting. Korting may resell any abandoned or forfeited items.